It's official, I have a REAL, legit website. It's been a loooong time coming and I am so excited to launch. Please check it out and follow me there. I will continue blogging through the blog integrated on my page, so this will be my LAST post here on Blogger. Thank you to those who support me, subscribe, follow me, share me, love me...it would not have been possible without you and your wonderful positive energy!
I'm grateful for YOU!
http://www.eatsuitelivesweet.com/
Friday, November 1, 2013
Wednesday, October 16, 2013
Jamz!
I began training for the RR3 last week and have come to appreciate music more than ever! That, and training partners. The competing squad from Hercules CrossFit is made up of nothing but bad-ass, amazing, unique, beautiful people. I love training with them!

**Full disclaimer: Sometimes I like cheesy, sometimes hood rich and rauncy, but mostly I'm a house head! Oh, and apparently, I LOVE Rihanna.
Katy Perry - Walking On Air
Rihanna - Hard (Chew Fu Remix)
Betty Who - Somebody Loves You
Dave Aude - Figure It Out ft. Isha Coco (Ralphi Rosario Remix)
Deadmau5 vs. Melleefresh - Cocktail Queen
Rihanna - Right Now (David Guetta Remix)

Hyper Crush - Bad Boyz
Iggy Azalea - Work
Kaskade - Sorry (Dirty South Remix)
Rihanna - Diamonds (Bimbo Jones Vocal Remix)
Ke$ha - Crazy Kids ft. Will.I.Am
The Knocks - Modern Hearts ft. St. Lucia
Lady Gaga - Applause
Mike WiLL Made-It - 23 ft. Miley Cyrus, Juicy J, & Wiz Khalifa
Lana Del Rey - Summertime Sadness (Cedric Gervais Remix)
Nicki Minaj - Pound the Alarm
Rihanna - We Found Love ft. Calvin Harris
Steve Angello - Voices (Eric Prydz Remix)
Robin Thicke - Give It 2 U ft. 2 Chainz
Monday, September 23, 2013
Nut Butters...don't BUY them, MAKE them!
Why you might ask? Well, one because it's HEAPS cheaper and two because it's fun and easy! So this recipe works for coconut, almonds, walnuts, pecans, sunflower seeds, sesame seeds, etc. I've made butters at home for almost every nut and seed you can name.
Ok, now here's a note about doing this with nuts and seeds. The cooking times will vary but the process is exactly the same...EXCEPT, if you want crunchy seed or nut butter, process about 75% of the batch until completely smooth, and then add the rest in and process until chopped and combined. Seeds roast quickly just as the shredded coconut does. Nuts take a little longer. Keep in mind that coconut has STABLE saturated fat which is ideal for cooking and heating. Seeds and other nuts contain different types of fat and are not great for heating. So, I recommend sticking to raw or only SLIGHTLY roasted nut and seed butters. Enjoy!
Toasted (or Raw) Coconut Butter
makes about 8 oz...perfect for a half pint mason jar!
WHAT YOU NEED
WHAT TO DO
Ok, now here's a note about doing this with nuts and seeds. The cooking times will vary but the process is exactly the same...EXCEPT, if you want crunchy seed or nut butter, process about 75% of the batch until completely smooth, and then add the rest in and process until chopped and combined. Seeds roast quickly just as the shredded coconut does. Nuts take a little longer. Keep in mind that coconut has STABLE saturated fat which is ideal for cooking and heating. Seeds and other nuts contain different types of fat and are not great for heating. So, I recommend sticking to raw or only SLIGHTLY roasted nut and seed butters. Enjoy!
Toasted (or Raw) Coconut Butter
makes about 8 oz...perfect for a half pint mason jar!
WHAT YOU NEED
- 1/2 lb unsweetened, shredded coconut (I buy mine organic, in bulk from El Cerrito Natural Grocery for $2.99/lb)
WHAT TO DO
- Heat your oven to 350F. If you want raw coconut butter, start at step 4.

- Spread the coconut out flat on a baking sheet. It's OK if the layer is thick, just make sure it's level for even toasting!

- Bake the coconut at 350F for about 3 minutes, then switch to broil and cook an additional 1-2 minutes. This process happens QUICK. A minute over and your coconut may start to burn so keep an eye on it!

- While it's still hot, add the coconut to your food processor with the standard blade in place. A quality, high powered blender may work as well!

- Process until smooth. This takes just a few minutes when the coconut is hot, and possibly a few minuted more when it's raw. Depends on your machine. The longer you keep the blade running, the smoother it will be. So, if you want crunchier coconut butter, check it after a minute or two and test out the consistency.

- Store butter in an airtight, glass container and let cool slightly before closing. Keep at room temperature, do not refrigerate!


Add-ins are a great way to have fun with homemade butters and create different flavor profiles! Recommended add-ins:
- pecans
- cinnamon
- cocoa powder
- vanilla extract
- dark chocolate (85% or higher)
 |
| Serving suggestion. Hot, toasted coconut butter over sliced apples with freshly ground cinnamon and cocoa powder. An amazing treat!! |
Saturday, September 21, 2013


Friday, September 13, 2013
Costco's Deal of the Month (September)
This month at Costco...
The organic, grass-fed beef "box" which they began selling a few months ago is now on sale for $40 off! It's normally $179.99 but THIS MONTH ONLY for $139.99 you get an assortment of quality, trimmed cuts! (4) 16 oz Rib-eyes (4) 14 oz NY Strips (4) 10 oz Top Sirloins and (4) 8 oz Tenderloins. At 12 lb total that comes out to $11.66/lb which is more than a steal, it's a freaking crime!
The meat is not as local as it could be (it's from an organic farm in Oregon which uses sustainable farming practices) but that's incomparably better than the conventional raised beef you find in all other stores. It's also heaps better than both the organic ground beef Costco currently sells under it's own brand name, Kirkland Signature, and the Trader Joe's organic grass-fed beef which is sourced from THREE different countries!
So what I'm trying to say is, JUMP on this deal. Go in with a friend or two! Or, stock your freezer if you have a large family. Offer expires 9/19/13.
This month, Costco also started featuring a separate coupon book for their organic items. There are some REALLY good deals here! Especially for people on-the-go and for those of you with children! Now, I realize almost none of these are "Paleo" but I don't care. Like I've said a million times, I'm not a nutrition elitist. I want to help people make BETTER choices, and these are some great ones! Check 'em out:
 |
| Not made from the milk of grass-fed cows but a HUGE step up from conventional string cheese! Pack these in your kids lunch box if they are casein and lactose tolerant! Great source of fat and protein. |
 |
| The organic kefir would be another great item for a kids lunch or after school snack! |
 |
| Frozen juice tubes for dessert on a hot day and steel cut oatmeal for a quick breakfast option! |
 |
| The sliced chicken breast would be an EASY protein add-on to salads for lunch at work and both kids and adults would enjoy the apple chips as a sweet, crunchy snack. I like them in my homemade trail mix! |

 |
| I totally took advantage of the killer deal on that tomato sauce. I prefer to make my own, but it's good to have some on hand when I don't want to! Haha. And at that price, how could I not? |
 |
| Never will you ever find a better price for organic, virgin coconut oil! Holy ____! |
Thursday, August 29, 2013
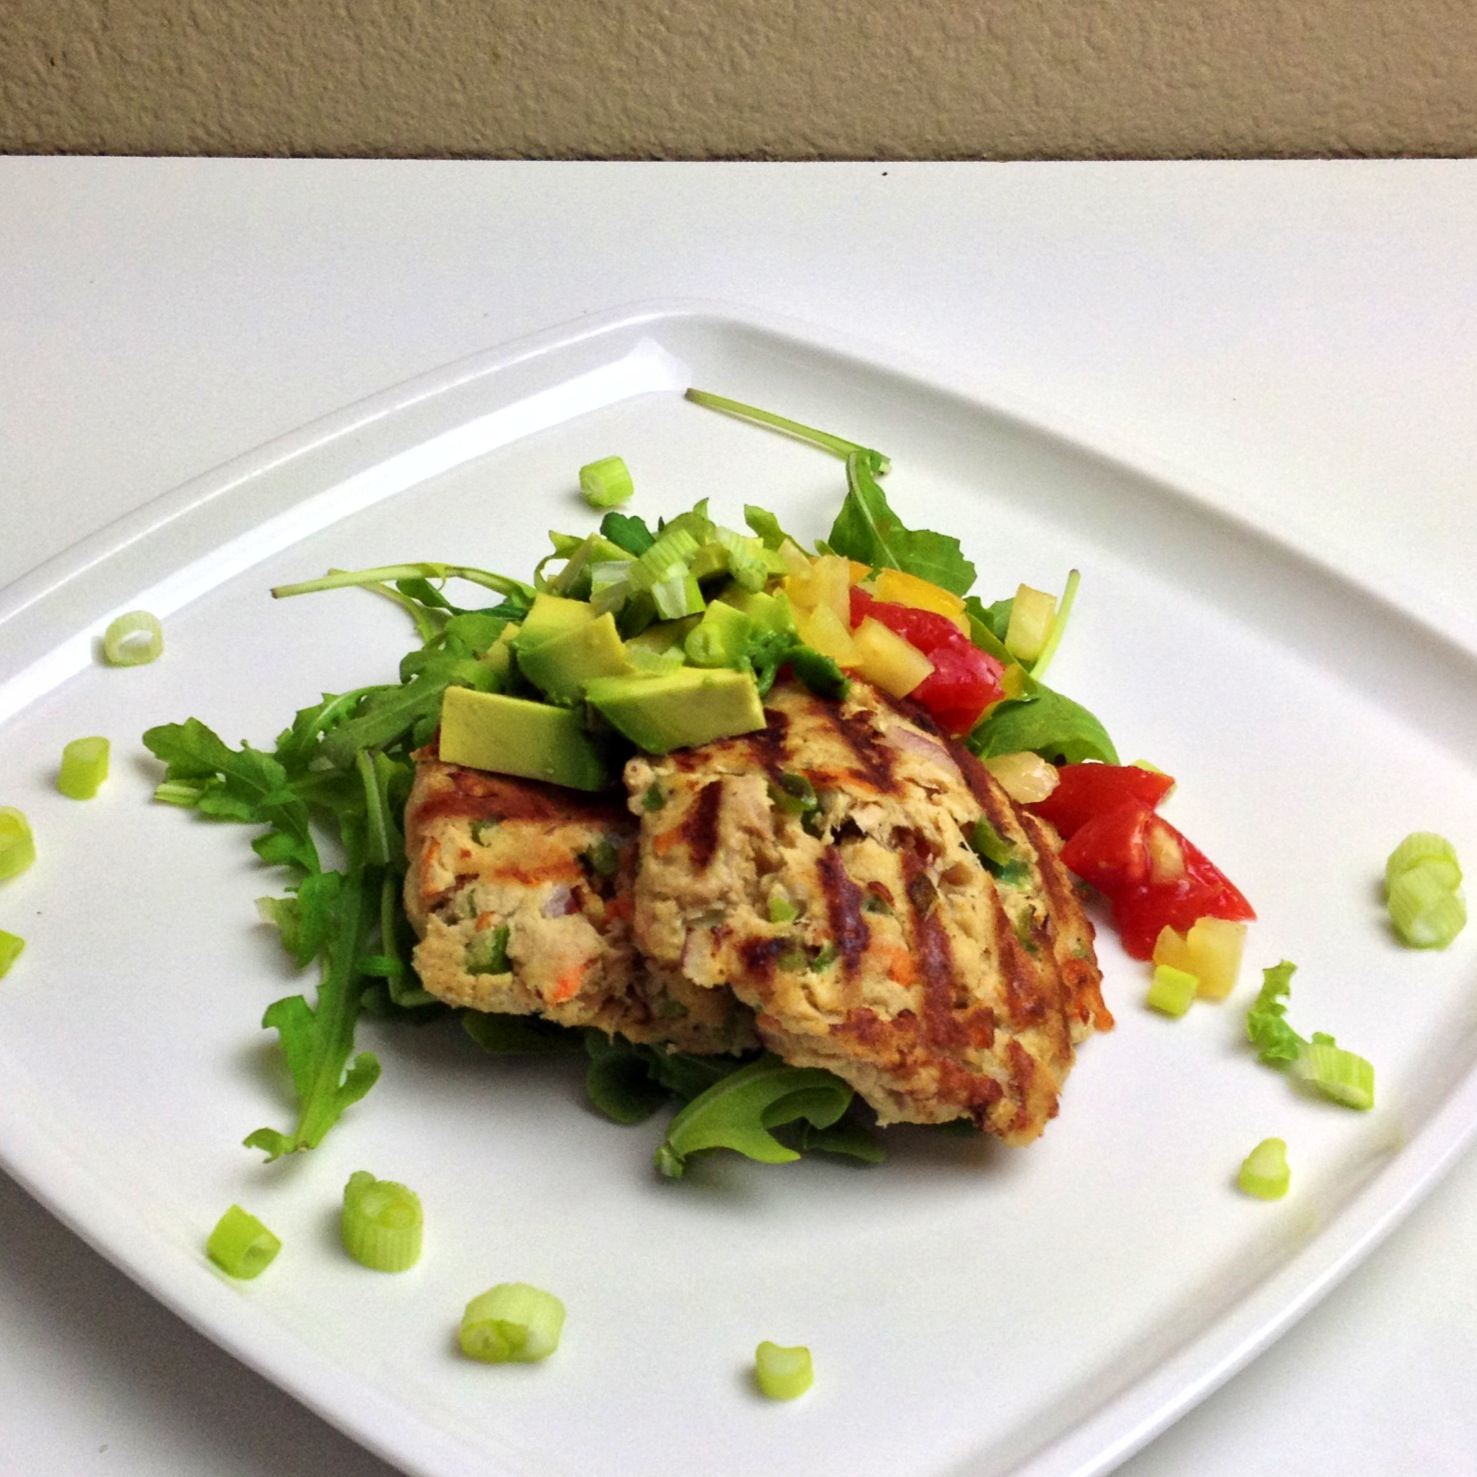
Grilled Crab Cakes
(makes 3 servings)
WHAT YOU NEED
- coconut oil (for cooking)
- 2 cans of crab, strained (I choose Wild Planet which I purchase from Costco)
- 1 small carrot, grated
- 1/4 small red onion, diced
- 1/4 green bell pepper, diced
- 1-2 tbs mustard
- 2 eggs yolks (save the whites for a breakfast omelette!)
- 2 tsp coconut aminos (optional, I feel like it ties the flavors together very well)
- freshly ground black pepper to taste
- sliced green onions for garnish
WHAT TO DO
- Heat oil in a grill pan over medium heat.
- In a mixing bowl, combine crab, carrot, onion, bell pepper, mustard, egg yolks, coconut aminos, and black pepper and mix until well combined. For maximum flavor, place this patty mixture in the fridge overnight!
- Using your hands, form 6 tight balls of equal size and press them out just until slightly flat but still thick.
- Add patties to hot pan and cook about 4 minutes on each side.
- Enjoy them hot over leafy greens with avocado and fresh tomatoes (when in season)!
Friday, August 23, 2013
Eggplant Buns
prep time: 10 minutes
cook time: 15 minutes

cook time: 15 minutes
I have NEVER been successful at creating eggplant crisps/chips...especially thick ones. I was given a BEAUTIFUL eggplant by a friend recently and as always, the damn thing intimidated me. I originally thought, "Maybe I'll just dice it and add it to my breakfast scramble." Easy, right? No! I needed a challenge. So, yesterday, my partner and I were down to the last of our amazing 4 lb home-roasted chicken and I wanted leftover sandwiches. Kinda like Thanksgiving, but from a bird of another feather. The chicken was BEGGING to be put in a sandwich after 3 days of bathing in its own buttery, flavorful broth.
 |
| My first roasted whole chicken! Turned out PERFECT! |
 |
| Garden fresh veggies from my friend Elise. Damn eggplant! |
WHAT YOU NEED
- 1 large (wide) eggplant
- stable cooking oil/fat (lard, tallow, clarified butter, coconut oil, etc.)
- a few pinches of sea salt
- any desired seasoning
WHAT TO DO
 |
| Amazon sells these for a great price! |
- Preheat oven to 450F.
- Using a mandolin slicer set to the THICKEST slice setting, slice the eggplant into however many slices you need. Don't slice the entire thing if you don't plan on using it, it will brown and get all nasty. If you want to make "chips," use the thinner setting.
- Place each slice between a few layers of paper towels and press down evenly to remove as much excess moisture as you can without murdering the veggie. The more moisture you extract, the better.
- Use your fingertips to rub an even, THIN layer of oil on both sides of each eggplant slice. Place them on a silpat lined baking sheet. I believe the success of this recipe is half technique, half equipment. Invest in a silpat liner, you will NOT regret it!
- Sprinkle some sea salt on the slices and/or your desired seasoning.
- Line the slices on your baking sheet and once the oven has reached 450F, place the sheet on the middle rack and bake for 15 minutes.
- Enjoy! You can eat them as is, or use them in place of bread like I did. These sandwiches were DELISH!

Subscribe to:
Posts (Atom)